Securing Child Restraints (Rear Seat Position)
When securing a child restraint in a rear seating position, study the instructions that came with the child restraint to make sure it is compatible with this vehicle.
If the child restraint has the LATCH system, see Lower Anchors and Tethers for Children (LATCH System) for how and where to install the child restraint using LATCH. If a child restraint is secured in the vehicle using a safety belt and it uses a top tether, see Lower Anchors and Tethers for Children (LATCH System) for top tether anchor locations.
Do not secure a child seat in a position without a top tether anchor if a national or local law requires that the top tether be anchored, or if the instructions that come with the child restraint say that the top strap must be anchored.
In Canada, the law requires that forward-facing child restraints have a top tether, and that the tether be attached.
If the child restraint does not have the LATCH system, you will be using the safety belt to secure the child restraint in this position. Be sure to follow the instructions that came with the child restraint. Secure the child in the child restraint when and as the instructions say.
If more than one child restraint needs to be installed in the rear seat, be sure to read Where to Put the Restraint .
The vehicle's lap-shoulder belts for the first and second row seating positions are equipped with freefalling latch plates. If the vehicle has a third row, the lap-shoulder belts have either free-falling or cinching latch plates.
Use the following pictures to determine the latch plate style:
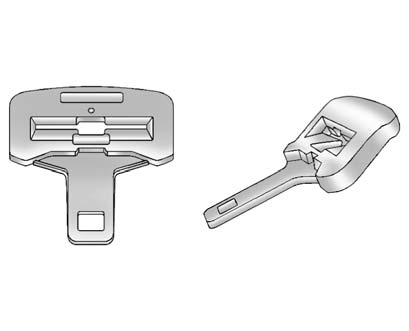
Free-Falling Latch Plate
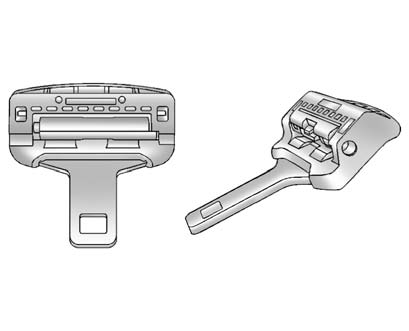
Cinching Latch Plate
1. Put the child restraint on the seat.
2. Pick up the latch plate, and run the lap and shoulder portions of the vehicle's safety belt through or around the restraint. The child restraint instructions will show you how.
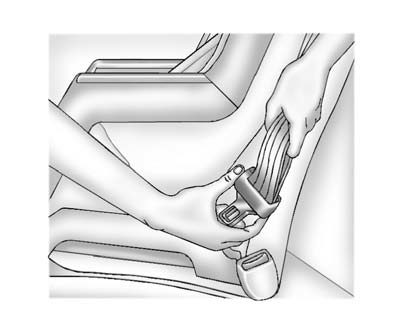
For third row seating positions, with cinching latch plates, tilt the latch plate to adjust the belt if needed.
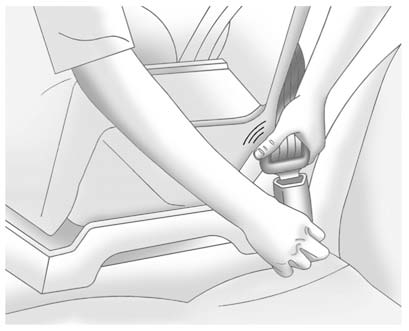
3. Push the latch plate into the buckle until it clicks.
Position the release button on the buckle so that the safety belt could be quickly unbuckled if necessary.
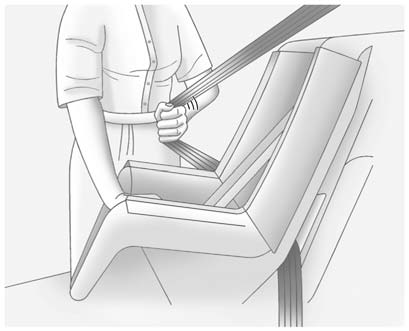
4. For passenger seating positions with a lap-shoulder belt and a free-falling latch plate, pull the rest of the shoulder belt all the way out of the retractor to set the lock. When installing a child restraint using a lap-shoulder belt and a cinching latch plate, skip Step 4 and proceed to Step 5.
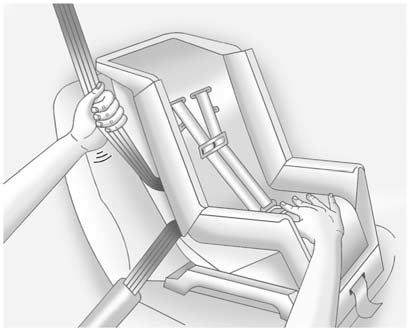
5. To tighten the belt, push down on the child restraint, pull the shoulder portion of the belt to tighten the lap portion of the belt and feed the shoulder belt back into the retractor. When installing a forward-facing child restraint, it may be helpful to use your knee to push down on the child restraint as you tighten the belt. Try to pull the belt out of the retractor to make sure the retractor is locked. If the retractor is not locked, repeat Steps 4 and 5.
6. If the child restraint has a top tether, follow the child restraint manufacturer's instructions regarding the use of the top tether. See Lower Anchors and Tethers for Children (LATCH System) for more information.
7. Before placing a child in the child restraint, make sure it is securely held in place. To check, grasp the child restraint at the safety belt path and attempt to move it side-to-side and back-and-forth. When the child restraint is properly installed, there should be no more than 2.5 cm (1 in) of movement.
To remove the child restraint, unbuckle the vehicle safety belt and let it return to the stowed position. If the top tether is attached to a top tether anchor, disconnect it.
See also:
Mobile Apps
Mobile apps are available for
download through iTunes® to then
access the iPhone® App Store
and Google™ Marketplace for
Android™. Search for the apps to
download. The apps are free of
char ...
Engine Overheating
The vehicle has several indicators to warn of engine overheating.
There is a coolant temperature gauge on your vehicle's instrument panel. See
Engine Coolant Temperature Gauge .
In addit ...
CD Player (Radio with CD)
The CD player can play audio CDs and MP3 CDs.
The CD player will not play 8 cm(3 in) CDs.
Care of CDs
Sound quality can be reduced due to disc quality, recording method, quality
of the music ...


