


Installing the Crossrails
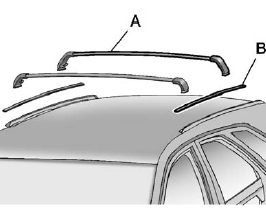
A. Crossrails
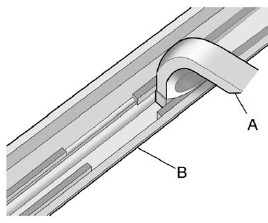
B. Siderail Cover
Before installing the crossrails (A), remove the siderail covers (B). Pull straight up on the rear of the siderail cover. Store covers flat, do not stack items on them.
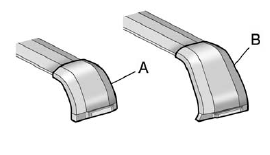
1. Identify the front and rear crossrail.
2. The front crossrail (A) is smaller than the rear crossrail (B).
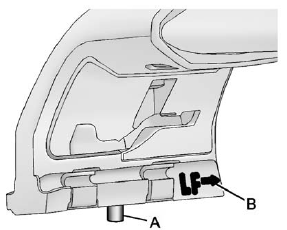
3. The crossrail supports are labeled with an arrow (B) that needs to point toward the front of the vehicle. A pin (A) will be visible on the bottom when the crossrail support lever is down.
To install the crossrail support, move the lever into the forward upper position; the pin (A) will not be visible.
4. Locate the forward or rearward cut-out in the siderail channel.
5. Insert both crossrail ends into the cut-outs, making sure the arrows are pointed toward the front of the vehicle.
6. Levers must still be in the forward up position. Move the front crossrail forward beyond the cut-out area (B). For the rear crossrail, slide the crossrail assembly (A) rearward until the entire crossrail support is in first position beyond the channel cut-out area (B).
7. Move the levers on both crossrails to the down position.
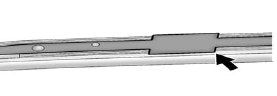
Slide the crossrail until the crossrail pin engages.
8. The crossrails should lock in the same hole position on each side.
See also:
Driver Information Center (DIC)
The DIC display is located at the bottom of the instrument panel cluster. It
shows the status of many vehicle systems and enables access to the personalization
menu.
The DIC buttons are located ...
Weight of the Trailering Combination
It is important that the combination of the tow vehicle and trailer does not
exceed any of its weight ratings — GCWR, GVWR, RGAWR, Trailer Weight Rating or Tongue
Weight. The only way to be sure i ...
Exiting the Feature Settings Menu
The feature settings menu will be exited when any of the following occurs:
The vehicle is no longer in ON/RUN.
The trip/fuel or vehicle information DIC buttons are pressed.
The end of the feat ...